This will be a quick down and dirty tutorial on making a to-do list using React. If you’re anything like me todo lists just really get you fired up.
How to Build a To-Do List with React


Now that you’ve caught your breath, I know what you’re thinking, great, another React to-do list and here is the part where he’s going to say “But wait! This post is going to show you a new special, tricky way to use React!”
Well, I have good news for you, I’m not going to say that. So if you’ve
already made a to-do list or two with React then I’ll save you some time
and tell you to move along…this isn’t the post you’re looking for (?? See what I did there?).

If you’re new to React and/or Javascript and you’re wanting to dip your toes in but have no idea where to start then stick around and you’ll be up and be coding with React in just a few minutes!
This app is already bootstrapped using Create React App, and I have added some minor styling with CSS. If you’d like to add your own styling to things, you can always start from scratch here! React also has some really great Docs that I highly recommend reading which can be found at Reactjs.org
GET STARTED WITH REACT
- Clone this repository
$ git clone https://github.com/drehimself/todo-react
2. Make sure you’re in the todo-list-starter-files directory you
just created.
$ -cd todo-list-starter-files
3. Run
$ npm install or yarn
4. Run the app
$ npm start or yarn start
Great! Now you should have something that looks like this loaded in your browser. Not too bad for a few minutes right?!

Now one last step before we dive into the code and that is to install React Developer Tools which you can grab here. Once you have this installed, open chrome dev tools and you should see a tab labeled “React.” This is where you can inspect your React components and it makes debugging a lot easier.
Now a little background on React…
VIRTUAL DOM
React uses something called a Virtual DOM. We describe how we want the interface to look and React takes care of the how. It will hold a virtual view in memory and only re-renders particular parts of the virtual DOM through the state when it is needed instead of re-rendering the entire page every time.
REACT COMPONENTS
React describes the virtual DOM using components using JSX which is sort of a hybrid of Javascript and HTML. These components are reusable and composable and can manage their own private state.
FUNCTION COMPONENTS (STATELESS)
These are simple functions that return JSX and receive properties (props).
const MyComponent = (props) => {
  return (
    <elementOrComponent />
  );
}
CLASS COMPONENTS (STATEFUL)
These act as a function that returns JSX and also contains internal state.
class MyComponent extends Component {
  render() {
    return (
      <elementOrComponent />
    );
  }
}
Now you should see your project folder structure looking something like this.
todo-list-starter-files/
  node_modules/
  public/
    favicon.ico
    index.html
    manifest.json
  src/
    components/
      App.js
    images/
    styles/
    App.test.js
    index.css
  pacakge.json
  README.md
  yarn.lock
If you go into the public folder and open the index.html file you can see the div with id ‘root’ is where behind the scenes Create React App has configured Webpack to bundle your project and inject it. Webpack and its configuration is a whole other beast on its own and we won’t go into it here.
The index.js file in the root of the project is where React is selecting that root div and Rendering the react project into the index.html file.
Now if you go into the components folder in the src directory you’ll see the App.js file. This is the main component of our app and an example of a stateful component so let’s break this down.
At the top, you should see the beginning of our stateful component like mentioned before but then under that is the constructor where our state is initialized.
class App extends Component {
  constructor(props) {
    super(props);

    this.state = {};
  }
Further down you’ll see the render statement which returns the JSX that makes up the component. Note that JSX cannot have two HTML elements side-by-side so you will always have to wrap multiple elements with one parent container element.
render() {
    return (
      <div className="wrapper">
        <p>Let's make a todo list with React!</p>
      </div>
    );
  }
Next, let’s add an Input form in our App.js file so we can add items to our list.
render() {
  return (
    <div className="wrapper">
      <form className="todoInput">
        <input
          className="input"
          type="text"
          value={this.state.pendingItem}
          placeholder="Add an item"
        />
        <button type="submit" name="submit" value="submit">
          add
        </button>
      </form>
      <div>{this.state.pendingItem}</div>
    </div>
  );
}
Woah!!! wait a minute! What is all that? Yep, this is JSX. It’s pretty close to HTML but there are a few differences so I’ll walk you through them. First off JSX uses ‘className’ to add a class and often times you will use javascript in here by enclosing it with some curly braces.
As you can see we’re adding some values using our state but we don’t have that yet so let’s go add it. Go back up to our constructor and add ‘pendingItem’ to our state. This is what we will update as the user inputs text into our form.
class App extends Component {
  constructor(props) {
    super(props);

    this.state = {
      pendingItem: ""
    };
  }
  ...
}
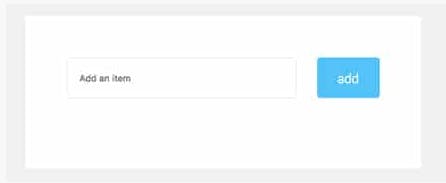
Now your app should look something like this…
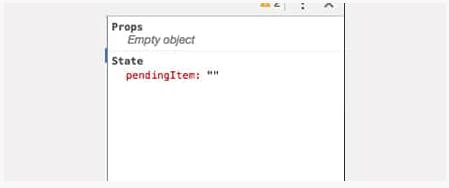
And if you open up your chrome dev tools and click on the ‘React’ tab then click on the App component, over on the right-hand side you should see ‘Props’ and ‘State.’ Under the state, you should see your ‘pendingItem’ now showing up.
Up next is adding the event handler to update pendingItem as the user types in the input. This will go in between the constructor and the render method.
handleItemInput = e => {
  this.setState({
    pendingItem: e.target.value
  });
}
Then, of course, we need to make this fire everytime the user types something in so we’ll add an event handler onto our input.
<input
  className="input"
  type="text"
  onChange={this.handleItemInput}
  value={this.state.pendingItem}
  placeholder="Add an item"
/>
Now let’s back up a second and walk through this again. The ‘hanldeItemInput’ function is capturing the ‘onChange’ event and is updating the ‘pendingItem’ state every time a change occurs. This is happening through React’s built-in ‘setState’ method which automatically tells React to update the virtual DOM anytime it changes. This is how React knows to only update a specific part of the DOM instead of the whole thing. Pretty slick right?
You should be able to see the text rendering in the div under the input form as you type. Let’s take another peek at the React dev tools again. Watch the ‘pendingItem’ state change as you type into the input. ?
Now that we have our input capturing this awesomeness, it really should be its own separate component from App.js. You can go ahead and delete the div rendering the ‘pendingItem’ state we won’t need it going forward. Next, create a new file in the components folder and call it InputForm.js.
import React from "react";

  const InputForm = props => {
    return (
      <form className="todoInput">
        <input
          className="input"
          type="text"
          onChange={props.handleItemInput}
          value={props.pendingItem}
          placeholder="Add an item"
      />
      <button type="submit" name="submit" value="submit">
        add
      </button>
    </form>
  );
};

export default InputForm;
As you can see this is different from App.js. This is a stateless component which is a basic function that returns JSX. however, you’ll notice some differences. Instead of ‘state’, we’re using ‘props.’ Props are properties that are being passed into a component. These can than be accessed by calling ‘props.myProps’
Even though this is a different component we now have access to the event handler we created on App.js and the state, ‘pendingItem’ as well. Let’s pass these new props into our Input component in App.js and import the new component. Okay, we have made quite a few changes so let’s take a second to make sure we’re on the same page, now our App.js should look something like this.
import React, { Component } from "react";
import "../styles/reset.css";
import "../styles/App.css";

import InputForm from './InputForm';

class App extends Component {
  constructor(props) {
    super(props);

    this.state = {
      pendingItem: ""
    };
  }

  handleItemInput = e => {
    this.setState({
      pendingItem: e.target.value
    });
  }

  render() {
    return (
      <div className="wrapper">
        <InputForm
          className="input"
          type="text"
          handleItemInput={this.handleItemInput}
          value={this.state.pendingItem}
          placeholder="Add an item"
        />
      </div>
    );
  }
}

export default App;
You’ll notice that on our InputForm component in App.js we changed onClick to handleItemInput. This is how props are passed down to children components. Now inside of InputForm.js, we have a handle to this method as props.handleItemInput.
Now on our form, we can type in items but we don’t really have a list yet. Let’s add some more state! Up in our constructor, we’ll add our list in the state.
state = {
  list: [],
  pendingItem: ""
};
Next, we need a handler to update the state everytime the user clicks the submit button. We’ll add that to App.js.
  newItemSubmitHandler = e => {
    e.preventDefault();
    this.setState({
      list: [
        {
          name: this.state.pendingItem,
        },
        ...this.state.list
      ],
      pendingItem: ""
    });
  };
Here we are preventing the submit button from refreshing the page. Then we capture the input name and save it to our list state, followed by adding back in any previous items in the list with the spread operator. Now we have to sync it up to the input form.
  return (
    <form
      onSubmit={props.newItemSubmitHandler}
      className="todoInput">
      ...
    </form>
  );
as well as make sure we pass through to props…
 render() {
    return (
      <div className="wrapper">
        <InputForm
          className="input"
          type="text"
          handleItemInput={this.handleItemInput}
          newItemSubmitHandler={this.newItemSubmitHandler}
          value={this.state.pendingItem}
          placeholder="Add an item"
        />
      </div>
    );
  }
Make sure you double check the Chrome dev tools and make sure the list state is updating everytime you click submit. If all looks good, let’s add our ‘List’ component so we can render the items on our list. Add a new file to the components folder called List.js.
import React from "react";

  const List = props => {
    return (
      <ul>
        {props.list.map((item, index) => (
          <ListItem
            key={index}
            item={item.name}
          />
        ))}
      </ul>
    );
  };

export default List;
This is another stateless component and we’re using Javascript’s map method to iterate over it and render a list item for every todo item we have entered into our state. This is the true beauty of React. Anytime we change the state this map function will re-render any added or removed items from ‘list’ in our state. (*when using ‘map’ you should always add a unique key to each element being rendered.)
Before moving on let’s be sure to import List into App.js and create our ListItem component as well.
import List from './List';

...

render() {
  return (
    <div className="wrapper">
      <InputForm
        newItemSubmitHandler={this.newItemSubmitHandler}
        handleItemInput={this.handleItemInput}
        pendingItem={this.state.pendingItem}
      />

      <List list={this.state.list} />
    </div>
  );
}
As you can see the List component contains another component called ListItem. Let’s go ahead and create that file and import accordingly.
ListItem Component:
import React from "react";

const ListItem = props => {
  return (
    <li>
        {props.item}
    </li>
  );
};

export default ListItem;
and import into List component:
import ListItem from "./ListItem";
You’ve done it. You now have a to-do list created with React!

One last thing to do before we wrap up and that’s to remove our list items if we don’t want them. So let’s write another handler in App.js to update the list state when an item is removed.
 handleRemove = index => {
    const newState = this.state.list.filter(item => {
      this.state.list.indexOf(item) !== index
    });

    this.setState({
      list: newState
    });
  };
Now there are a couple extra steps here in order to make sure we remove the correct list item from our array when we click the delete button. First, we’re creating a new copy of the list by using Javascript’s filter method. This creates a new array from the list state with only the items we want to keep on our list.
Then we’re updating state and passing in the new list. As you can see we need the onClick handler to pass in an index as a parameter so let’s take care of that next.
  const List = props => {
    return (
      <ul>
        {props.list.map((item, index) => (
          <ListItem
            key={index}
            itemIndex={index}
            handleRemove={props.handleRemove}
          />
        ))}
      </ul>
    );
  };
Don’t forget to pass ‘this.handleRemove’ into the List component first and then add the ‘itemIndex’ prop onto the ListItem component in the map method.
Then finally add the onClick event handler onto the button in the ListItem component. In order to pass in our index to the event handler, we’re going to use an anonymous function. This prevents the function from firing when the code is first executed and will only fire when it’s clicked on.
const ListItem = props => {
  return (
    <li>
        {props.item}
        <button className="action" onClick={
          () => {props.handleRemove(props.itemIndex)}
        }>
        x
      </button>
    </li>
  );
};
Aaaandd finished! I know that was a little long-winded but hopefully, you enjoyed React as much as I do. These steps are one of many ways to do this as usual when it comes to coding so I’d love to hear any alternate takes on the todo list!
If you have any questions or share my excitement for all things React feel free to shout out to me on the twitter @seantbaier