Flutter Testing Made Easy

FLUTTER WIDGET TESTING

I’m sure I don’t have to tell you how important automated tests are to the software development process. Even if they didn’t have other advantages I’d write tests just so I could have that sense of security when changing things in an application. Most every framework and language has some sort of testing ability built into it and Flutter is no different. However the documentation for widget testing in flutter is pretty poor. This post should get you over some of the gotchas I faced.

If you’re new to Flutter then one of the key observations is that everything is a widget. Widgets are composed of other widgets and it’s widgets all the way down. Frequently we’ll have some complex user interaction in these widgets. This is something we want to test.

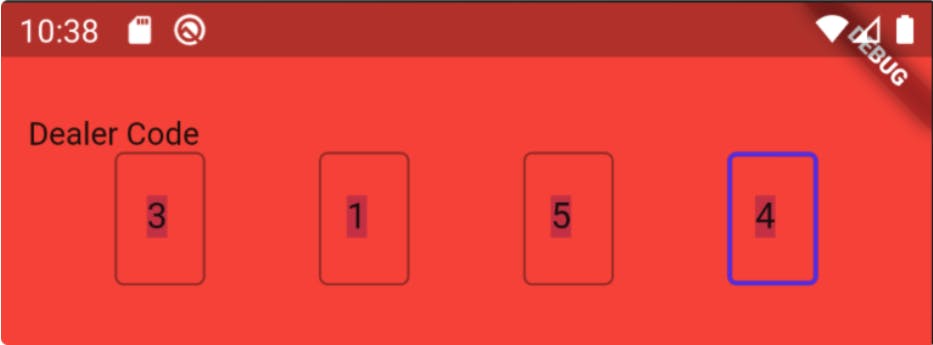
To give us something to work with let me show this data entry screen (super rough right now).
This is a pretty common sort of interaction where we want people to enter a 4 digit code and as they enter each digit the focus moves to the next one. Let’s test this thing.

GETTING SET UP

First thing we need is a test file. I’m keeping these in the test folder in the flutter project and in this case I named my file codeEntryWidgetShould.dart

This sets up the basic structure of the test suite. Within this main method start with

This testWidgets holster will hook into the test framework so that the test is run when running flutter test. Next to create the widget we call

PumpWidget will create the widget for you to test. Now if we were to run this with my particular widget there would be terrible errors. (Incidentally, you can run just this test class with flutter test .\test\widgets\codeEntryWidgetShould.dart)

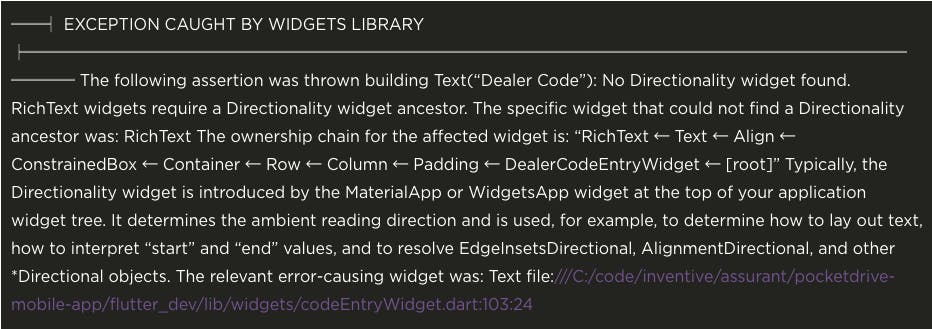
The problem is that this widget uses TextField which assumes some structure is set up for it. In particular here the problem is that flutter doesn’t know which direction text should be going, left-to-right or right-to-left. We could wrap this in a Directionality widget but that’s actually not going to be enough here. If we do we’ll still have errors like

We need to be inside of a material app to get this widget to work properly. So if we change our widget creation to

That will nicely create the widget for us. Notice that there is a lambda being passed into the onchange. This allows us to surface change events back to the test.

FIRST TEST

Now we’ve got the widget what do we do with it? Well our first test should be if the value that comes back from the widget is actually the right one. To do this we’d like to click on each text box enter a value and be assured that the result is correct.

First we need to find the boxes to enter text into. This is done using a finder. I gave each text field in my widget a key so it is easy to find. You don’t have to do this but I’m thinking of the key as being like an id in HTML so it is a very powerful tool for aiding in getting the right control

Next we’ll need to enter text into each field.

and finally test if the code has been properly updated

Awesome, that wasn’t too hard.

TESTING WIDGET STATE

We now want to check to make sure that focus changes properly after entering data in each widget. The set up here is much the same

It can be kind of tricky finding the focused element, fortunately we’ve set a FocusNode on the text field. We just need to get it. To do this we have to call evaluate() on the finder and take the first result. Then we can cast that and check if the focusNode has focus

And that’s that.

To my mind there is a lot to be desired here around the ease of widget testing. Finders are a little crude and the assertions available are crude. The setup requiring a MaterialApp and a Scaffold is awkward and likely to stop some people from testing. Ideally this process should be as easy as possible so no barriers exist for people.